
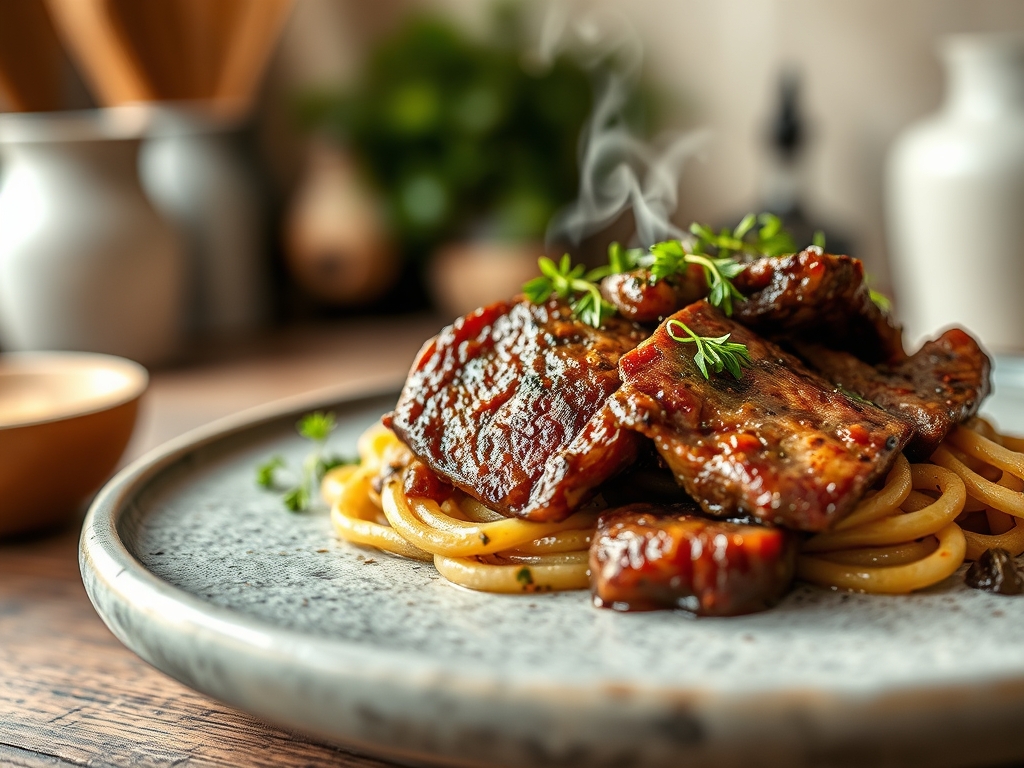
Picture the heavy weight of a cast iron skillet resting on your stove; it is the ultimate conductor for the alchemy we are about to perform. When you crave something substantial, nothing beats the savory, iron-rich profile of high protein beef recipes to fuel your day. We are moving past basic burgers into a world of sophisticated, muscle-building culinary art.
The air in your kitchen should smell like toasted peppercorns and rendered fat. That scent is the first sign that your kitchen is transforming into a high-performance lab. We are balancing the primal satisfaction of a perfectly seared steak with the precision of modern nutritional science. Whether you are prepping for a marathon or just a long Tuesday, these meals provide the amino acid profile your body demands without sacrificing the piquant, rich flavors that make eating a joy. Let us get your apron on; it is time to master the art of the sear.
The Gathers:
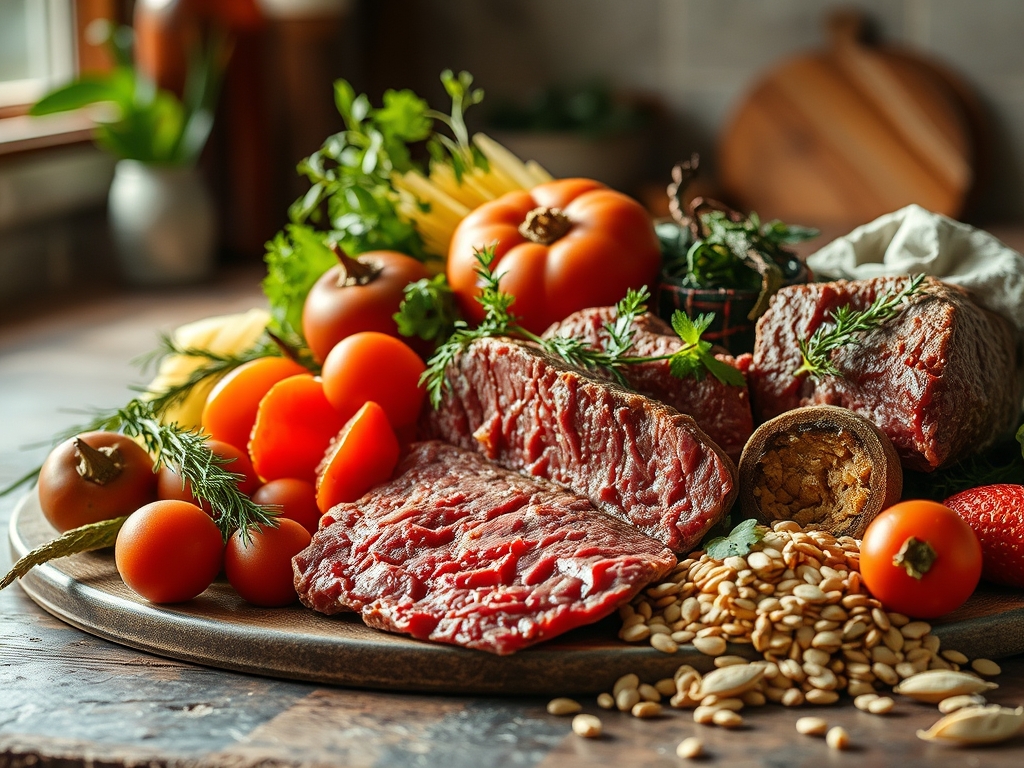
To execute these high protein beef recipes with precision, your mise-en-place must be flawless. Start with the centerpiece: lean cuts like top sirloin, eye of round, or 93/7 ground beef. These selections offer the highest protein-to-fat ratio, ensuring you hit your macros without excess caloric density. You will need a digital scale to ensure your portions are exact; even a half-ounce discrepancy can alter your nutritional tracking.
Gather your aromatics: fresh cloves of garlic, shallots, and ginger. Use a microplane to grate these into a fine paste; this increases the surface area, allowing the essential oils to infuse your fats more rapidly. For the liquids, keep a high-quality bone broth and low-sodium soy sauce nearby to add a viscous, savory depth to your sauces.
Smart Substitutions: If you are watching your sodium, swap traditional soy sauce for liquid aminos. To lower the saturated fat even further, use avocado oil for high-heat searing; it has a smoke point of 520 degrees Fahrenheit, which is significantly higher than butter or olive oil. If you want a creamy finish without the heavy cream, a dollop of Greek yogurt added off the heat provides a tangy, high-protein alternative that mimics the mouthfeel of a classic saucier reduction.
The Clock: Timing Your Chef's Flow
Efficiency in the kitchen is about managing the "Chef's Flow." For these six meals, expect a total preparation time of 40 minutes and a cumulative active cooking time of 90 minutes if you are batch-prepping. The secret is parallel processing. While your beef is tempering on the counter (never cook meat straight from the fridge), use your bench scraper to clear your cutting board of chopped vegetables.
Most of these recipes require a 10 to 15 minute sear or simmer. However, you must factor in the "resting phase." Beef requires at least 5 to 10 minutes of rest after hitting the heat to allow the muscle fibers to relax and reabsorb their juices. If you cut too soon, you lose the moisture that makes high protein beef recipes palatable. Plan your flow so that your complex carbohydrates and greens finish exactly when the meat has finished its rest.
The Masterclass:
1. The Perfect Sear for Sirloin Strips
Pat your beef dry with paper towels until the surface is bone-dry. Season aggressively with salt and pepper. Heat your heavy-bottomed skillet until a drop of water dances and evaporates instantly. Lay the beef away from you to avoid oil splatter.
Pro Tip: This relies on the Maillard Reaction. This chemical reaction between amino acids and reducing sugars creates the brown crust and complex flavor. If the pan is crowded, the meat will steam instead of sear, ruining the texture.
2. Deglazing for a Nutrient-Dense Pan Sauce
Once the beef is removed, you will see brown bits stuck to the pan. This is called "fond." Pour in a splash of red wine or beef bone broth and use a wooden spoon to scrape the bottom.
Pro Tip: Deglazing releases the concentrated flavors trapped in the fond. The liquid acts as a solvent, lifting the caramelized proteins and incorporating them into a sauce that is rich in collagen and minerals.
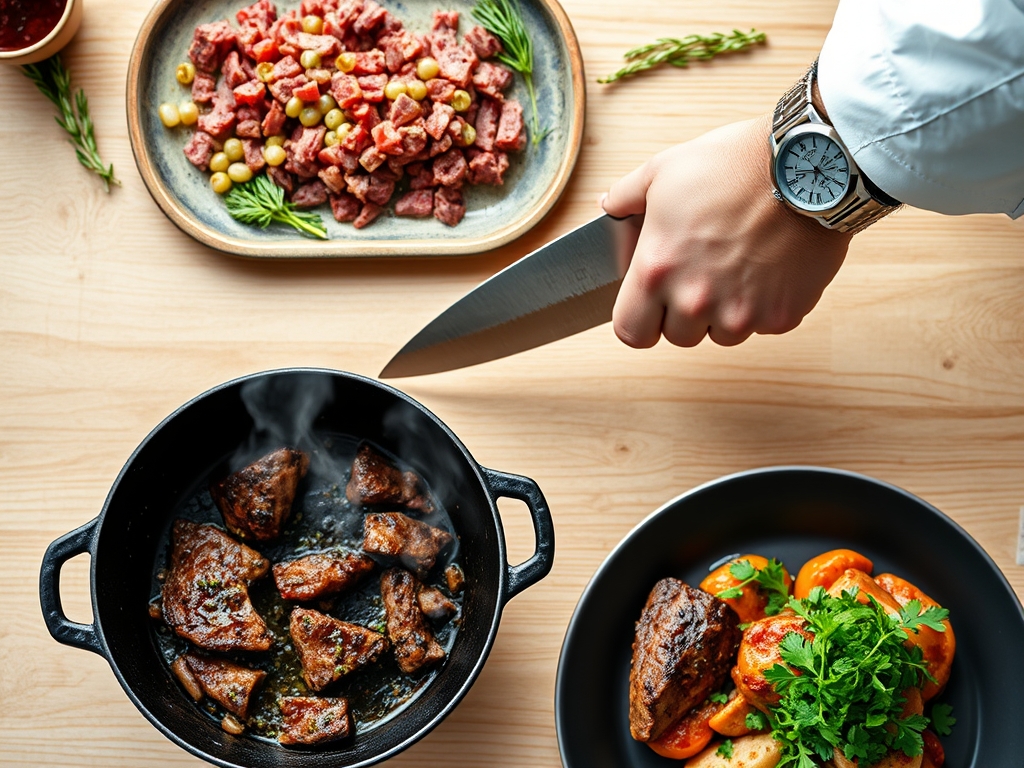
3. Aerating Your Ground Beef
When browning ground beef for bowls or tacos, do not just let it sit. Use a stiff spatula to break it into small, uniform crumbles. This ensures even heat distribution and prevents the center from remaining raw while the edges overcook.
Pro Tip: This process helps aerate the meat, allowing steam to escape efficiently. If moisture builds up, the temperature drops below the point of browning, leading to "gray meat" which lacks depth and flavor.
4. Emulsifying the Ginger-Soy Glaze
For our Asian-inspired beef bowls, whisk together sesame oil, honey, and soy sauce in a small bowl. Slowly drizzle this into the pan while stirring constantly.
Pro Tip: You are creating a temporary emulsion. The fats and water-based liquids are forced together. Adding a pinch of mustard powder or cornstarch can help stabilize this bond, ensuring the sauce clings to the beef rather than pooling at the bottom.
5. Managing Thermal Carryover
Remove your steaks or medallions when they are 5 degrees below your target internal temperature. Use a digital probe thermometer for absolute accuracy.
Pro Tip: Thermal carryover occurs because the exterior of the meat is much hotter than the core. Even after removal from the heat, the energy continues to move inward, raising the internal temperature. Ignoring this leads to overcooked, rubbery beef.
6. The Final Resting Phase
Place your cooked beef on a warm plate and tent it loosely with foil. Do not wrap it tightly, or the trapped steam will soften the crust you worked so hard to create.
Pro Tip: During cooking, proteins contract and push moisture toward the center. Resting allows these proteins to expand again, redistributing the juice throughout the cut. This ensures every bite is succulent and tender.
The Deep Dive:
When we look at the macros, these high protein beef recipes typically provide 35 to 45 grams of protein per serving with less than 12 grams of fat. This makes them ideal for muscle recovery. If you are following a Keto protocol, serve your beef over cauliflower rice with an extra drizzle of olive oil. For Vegan guests, you can apply these same searing techniques to extra-firm tofu or seitan, though the Maillard reaction will occur at slightly different temperatures.
The Fix-It: Common Pitfalls
- The Meat is Tough: You likely skipped the resting phase or sliced with the grain. Always slice against the grain to shorten the muscle fibers.
- The Sauce is Too Thin: You did not reduce the liquid enough. Let it simmer until it coats the back of a spoon.
- The Beef is Gray, Not Brown: Your pan was not hot enough or was overcrowded. Cook in batches next time.
For Meal Prep, the science of reheating is vital. To maintain "day-one" quality, reheat beef at a low power setting (50%) in the microwave with a damp paper towel on top. This prevents the proteins from tightening further and becoming "leathery."
The Wrap-Up:
Mastering high protein beef recipes is about more than just hitting your numbers; it is about respecting the ingredients and the physics of the kitchen. By using the right tools, like a heavy-bottomed skillet and a microplane, you elevate a simple meal into a gourmet experience. Remember, the secret is in the sear and the patience of the rest. Now, go forth and conquer your kitchen with confidence and a very sharp knife!
The Kitchen Table:
Which beef cut is best for high protein?
Top sirloin and eye of round are the best choices. They offer the highest protein density with the lowest saturated fat, making them perfect for lean muscle growth and heart health without excess calories.
How do I get a restaurant-style sear?
Ensure the meat is completely dry and the pan is smoking hot. Use a high-smoke-point oil and avoid moving the meat for at least three minutes to allow the Maillard reaction to fully develop the crust.
Can I meal prep beef without it getting dry?
Yes. Undercook the beef slightly (to rare or medium-rare) before storing. When you reheat it, the secondary cooking process will bring it to a perfect medium without stripping away the essential moisture and tenderness.
What is the best way to slice steak?
Always slice against the grain. Look for the direction of the muscle fibers and cut perpendicular to them. This mechanically breaks down the fibers, ensuring every bite is tender rather than chewy or stringy.