Imagine the sound of a heavy bottomed skillet meeting the flame; it is the opening note of a culinary masterpiece. When you are hunting for the best fingerling potato recipes, you are not just looking for a side dish. You are looking for that specific, glass-shattering crunch that gives way to a center as creamy as tempered butter.
Fingerlings are the overachievers of the root vegetable world. Unlike their starchy Russet cousins, these heirloom gems possess a waxy cell structure that holds its shape under intense thermal pressure. They are dense, nutty, and visually stunning. Whether you are hosting a high-stakes dinner party or just treating yourself to a solo gourmet Tuesday, mastering the fingerling is your ticket to "chef status" in your own kitchen. Today, we are stripping away the fluff and diving into the hard science of the perfect roast; because once you understand the molecular magic of a potato, you never have to follow a rigid recipe again.
The Gathers:
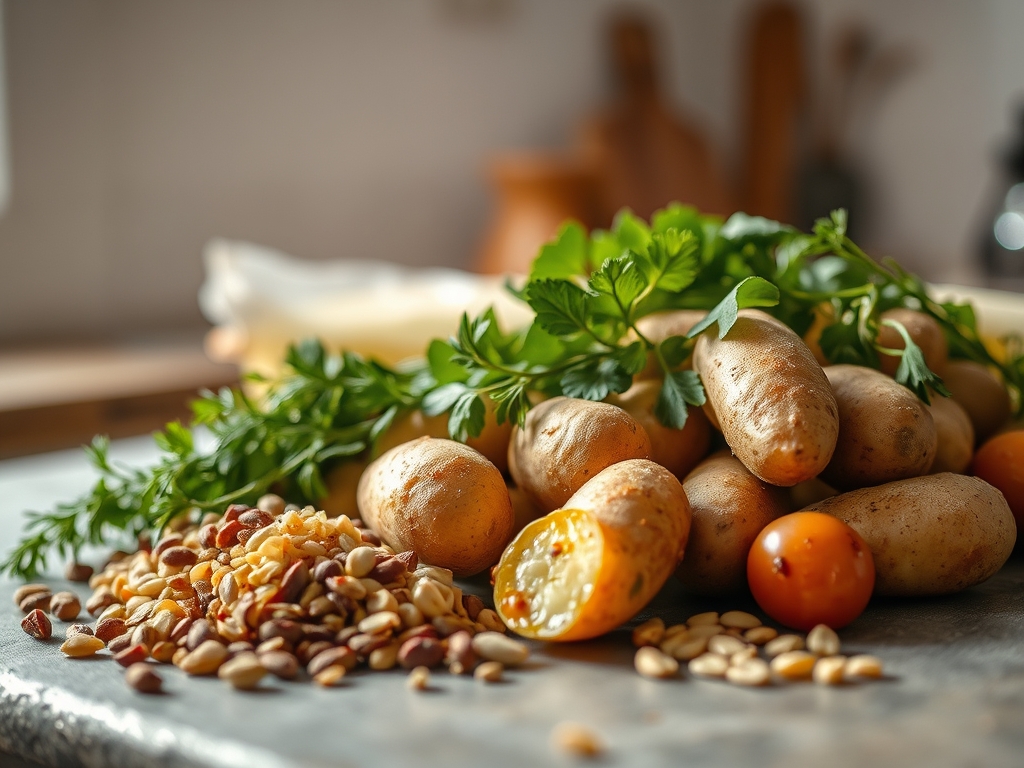
To achieve the gold standard of the best fingerling potato recipes, your mise-en-place must be precise. Start with two pounds of firm fingerlings; look for varieties like Russian Banana or French Fingerling. You will need high-quality fats. I recommend a combination of clarified butter (ghee) for its high smoke point and extra virgin olive oil for its piquant, grassy notes.
Gather your aromatics: fresh rosemary sprigs, thyme, and at least six cloves of garlic. You will also need flaky Maldon sea salt and freshly cracked black pepper. To take the texture to the next level, keep a small bowl of baking soda nearby. This is the secret weapon for alkalinity.
Smart Substitutions:
If you are avoiding dairy, duck fat is a phenomenal substitute for ghee; it offers a rich, gamey depth that vegetable oils cannot replicate. For a vegan profile, use an avocado oil base infused with nutritional yeast to mimic that savory, umami-rich finish. If you cannot find fingerlings, small New Potatoes or Cippolini onions can be prepped using similar thermal techniques, though the cook times will shift slightly due to sugar content.
The Clock:
Efficiency in the kitchen is about "Chef's Flow." This is the art of overlapping tasks so no heat is wasted. Your total active time is 15 minutes, while the passive roasting time is approximately 35 minutes.
- The Parboil (10 minutes): This happens while your oven preheats to 425 degrees Fahrenheit.
- The Infusion (5 minutes): While the potatoes drain and steam-dry, you are prepping your herb oil in a small saucier.
- The Roast (30 to 35 minutes): The potatoes enter the high-heat environment. Use this time to prepare your protein or a bright gremolata.
- The Rest (5 minutes): Never skip this. It allows the internal steam to redistribute, ensuring the skins stay crisp rather than becoming soggy.
The Masterclass:
1. The Alkaline Parboil
Place your scrubbed fingerlings in a pot of cold, heavily salted water. Add half a teaspoon of baking soda. Bring to a boil and simmer until the exterior is just tender but the core remains firm. Use a digital scale to ensure your salt ratio is roughly 2 percent of the water weight.
Pro Tip: The baking soda raises the pH of the water, which breaks down the pectin on the surface of the potato. This creates a starchy slurry that, once roasted, dehydrates into an ultra-thick, craggy crust.
2. The Rough-Up Technique
Drain the potatoes and let them sit in the colander for three minutes to allow moisture to evaporate. Use a bench scraper or a wooden spoon to vigorously toss them. You want the edges to look frayed and fuzzy.
Pro Tip: This increases the surface area for the Maillard reaction. More surface area means more contact with the hot fat, leading to exponentially more crunch.
3. The Fat Infusion
In a small saucier, gently heat your ghee and olive oil with smashed garlic and woody herbs. Do not let the garlic brown; you are simply looking to infuse the lipids with essential oils. Strain the oil over your potatoes and toss to coat every crevice.
Pro Tip: Fat is a flavor carrier. By infusing the oil first, you ensure the aromatics penetrate the potato skin rather than just sitting on top and burning in the high-heat oven.
4. The High-Heat Roast
Spread the potatoes on a preheated heavy-duty sheet pan. Ensure they are in a single layer with plenty of space between them. If you crowd the pan, they will steam rather than roast.
Pro Tip: Using a preheated pan triggers immediate conductive heat transfer. This sears the bottom of the potato instantly, preventing sticking and jump-starting the crisping process.
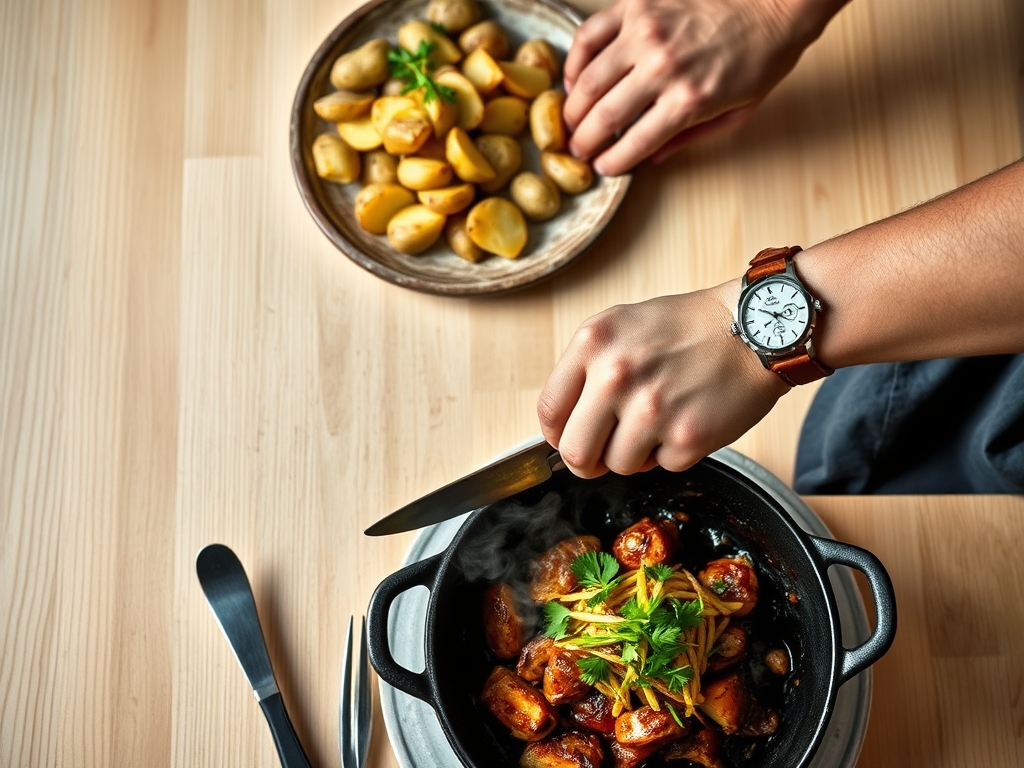
5. The Flip and Aerate
Halfway through the roasting process, use tongs to flip each potato. This is the moment to add your salt and pepper. Give the pan a firm shake to aerate the space between the vegetables.
Pro Tip: Flipping ensures even browning. Adding salt halfway through prevents the salt from drawing out too much moisture early on, which can hinder the initial browning phase.
6. The Herb Finish
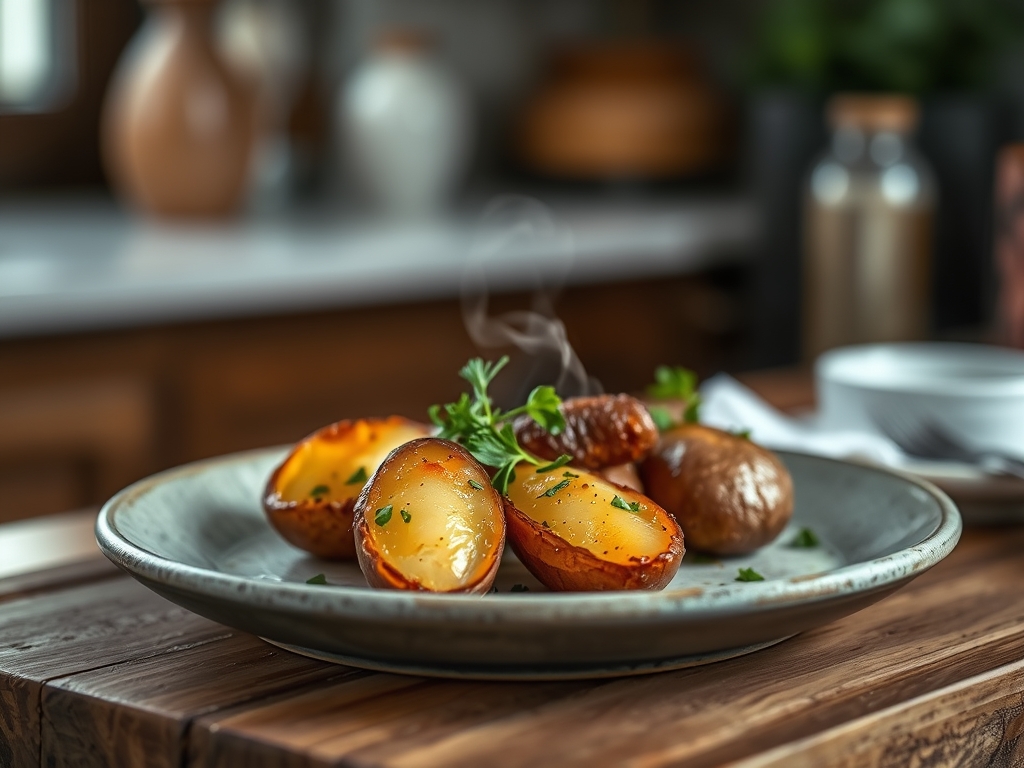
Once the potatoes are deep mahogany and sound hollow when tapped, remove them from the oven. Zest a lemon over them using a microplane and toss with fresh parsley.
Pro Tip: This utilizes thermal carryover. The residual heat of the potatoes is just enough to release the volatile oils in the lemon zest and fresh herbs without cooking the "bright" flavor out of them.
The Deep Dive:
From a nutritional standpoint, fingerlings are a powerhouse of complex carbohydrates and potassium. They are naturally gluten-free and can easily fit into a Paleo lifestyle if roasted in animal fats. For those on a Keto journey, keep portions small; fingerlings are lower on the glycemic index than Russets but still contain significant starch.
The Fix-It: Common Pitfalls
- Soggy Potatoes: Usually caused by overcrowding the pan or skipping the steam-drying step. Fix it by returning them to a high-heat oven on a wire rack to allow 360-degree airflow.
- Burnt Garlic: If you toss raw minced garlic in at the start, it will turn bitter. Fix it by using the infusion method or adding fresh garlic only in the last 5 minutes of roasting.
- Uneven Cooking: This happens when potatoes vary wildly in size. Fix it by using your bench scraper to halve the larger tubers so every piece is roughly the same volume.
Meal Prep and Reheating:
To maintain "day-one" quality, never use a microwave. The microwave agitates water molecules, making the starch retrogress into a gummy texture. Instead, reheat in a toaster oven or air fryer at 375 degrees for 6 minutes to re-crisp the exterior lipids.
The Wrap-Up:
Mastering the best fingerling potato recipes is a rite of passage for any serious home cook. It is the perfect marriage of chemistry and comfort. By manipulating the pH levels and maximizing the Maillard reaction, you transform a humble tuber into a culinary event. Remember: watch your heat, respect the starch, and never crowd the pan. Now, go forth and get that crunch!
The Kitchen Table:
Why are my fingerling potatoes not getting crispy?
You likely crowded the pan or skipped the steam-drying phase. Excess moisture creates steam, which prevents the Maillard reaction. Ensure each potato has breathing room on a preheated heavy-bottomed sheet pan for maximum conductive heat.
Do I need to peel fingerling potatoes before roasting?
Absolutely not. The skins of fingerlings are incredibly thin and delicate. When roasted properly, the skin becomes an integral part of the textural experience, providing a "snap" that protects the creamy, buttery interior of the vegetable.
What is the best fat for roasting potatoes?
Clarified butter or duck fat is superior for crispness. These fats have high smoke points and unique fatty acid profiles that create a thicker, crunchier crust than standard vegetable oils while adding an intense savory depth.
How do I prevent the herbs from burning in the oven?
Infuse your roasting oil with the herbs first, then strain them out. Add fresh, finely chopped herbs only during the final two minutes of roasting or as a garnish to preserve their bright, volatile flavor compounds and vibrant color.