
A slick of condensed cream splatters against the bottom of a searing skillet, and within seconds, the milk solids brown, sugars caramelize, and your kitchen fills with a nutty, roasted aroma that store-bought soups never deliver on their own. This transformation is the heart of smart campbell soup cream of chicken recipes, where a single can becomes the foundation for deeply flavored casseroles, sauces, and braises that taste like you spent hours at the stove. The secret lies in treating that can not as a shortcut, but as a blank canvas that responds brilliantly to heat, fat, and strategic seasoning.
Professional kitchens have long understood that convenience products shine brightest when subjected to proper technique. Cream of chicken soup delivers stable emulsifiers, concentrated poultry flavor compounds, and a starch matrix that thickens predictably under heat. But straight from the can, it reads flat, one-dimensional. The seven hacks that follow exploit Maillard browning, fat infusion, acid balance, and aromatic layering to turn that beige paste into restaurant-caliber sauces and bakes. Each method takes under ten minutes of active work yet produces results that make guests ask for the recipe.
These techniques work because they address the soup's inherent limitations: lack of textural contrast, muted seasoning, and absence of fresh aromatics. By toasting the soup base, building a proper fond, or folding in crisp vegetables at the last moment, you introduce complexity that the original formulation cannot provide. The result is dishes that honor the convenience factor while delivering the depth and brightness of scratch cooking.
The Gathers
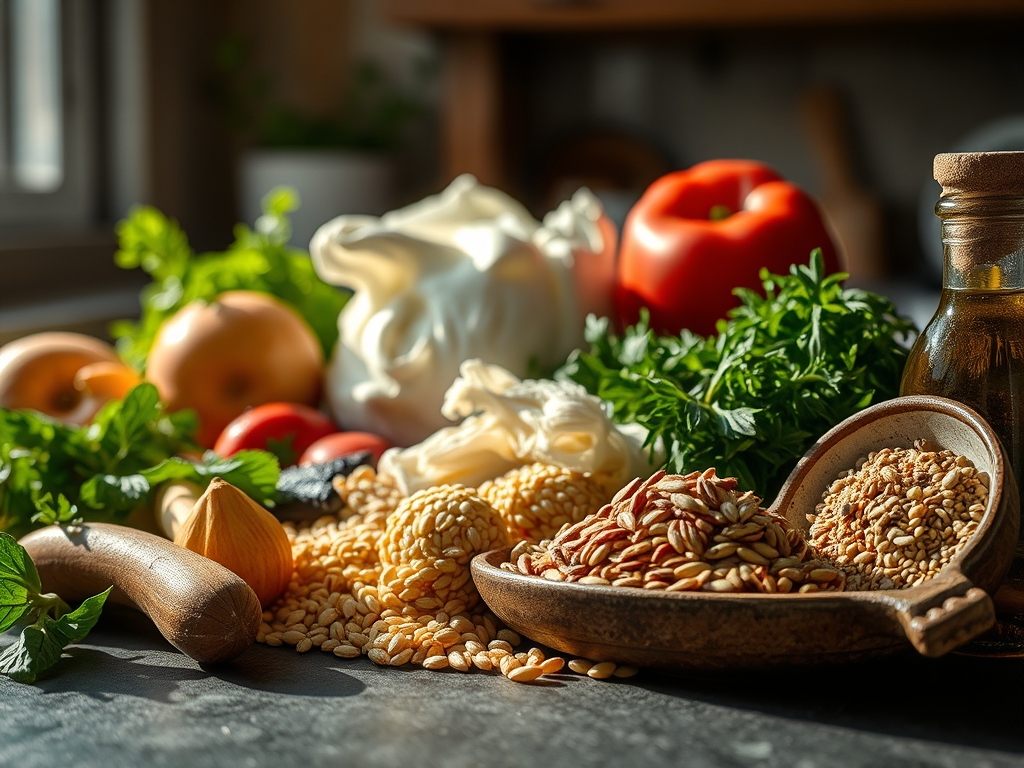
As you see in the ingredient spread below, the core arsenal remains simple: one 10.5 oz can of Campbell's Cream of Chicken Soup forms the base, while 2 tablespoons unsalted butter, 1 medium yellow onion (diced fine), 3 cloves garlic (minced), and 1/2 cup low-sodium chicken stock build the flavor scaffolding. Fresh thyme sprigs, a squeeze of lemon juice, and a pinch of white pepper provide the brightness and warmth that canned soup lacks.
For proteins, 2 cups cooked chicken breast (shredded) or rotisserie chicken works perfectly, though boneless thighs offer superior moisture retention. A handful of frozen peas or blanched green beans adds color and textural snap. Keep Panko breadcrumbs and grated Parmesan on hand for crust applications.
Smart Substitutions: Swap butter for ghee when pursuing deeper browning without burning milk solids. Use coconut cream in place of soup for dairy-free builds, though you'll need to add nutritional yeast for umami depth. Gluten-free? Ensure your soup brand uses rice starch instead of wheat flour, or thicken coconut milk with cornstarch slurry (1 tablespoon cornstarch to 2 tablespoons cold water).
The Clock
Prep Time: 8 minutes
Cook Time: 22 minutes
Total Time: 30 minutes
Yield: 4 servings
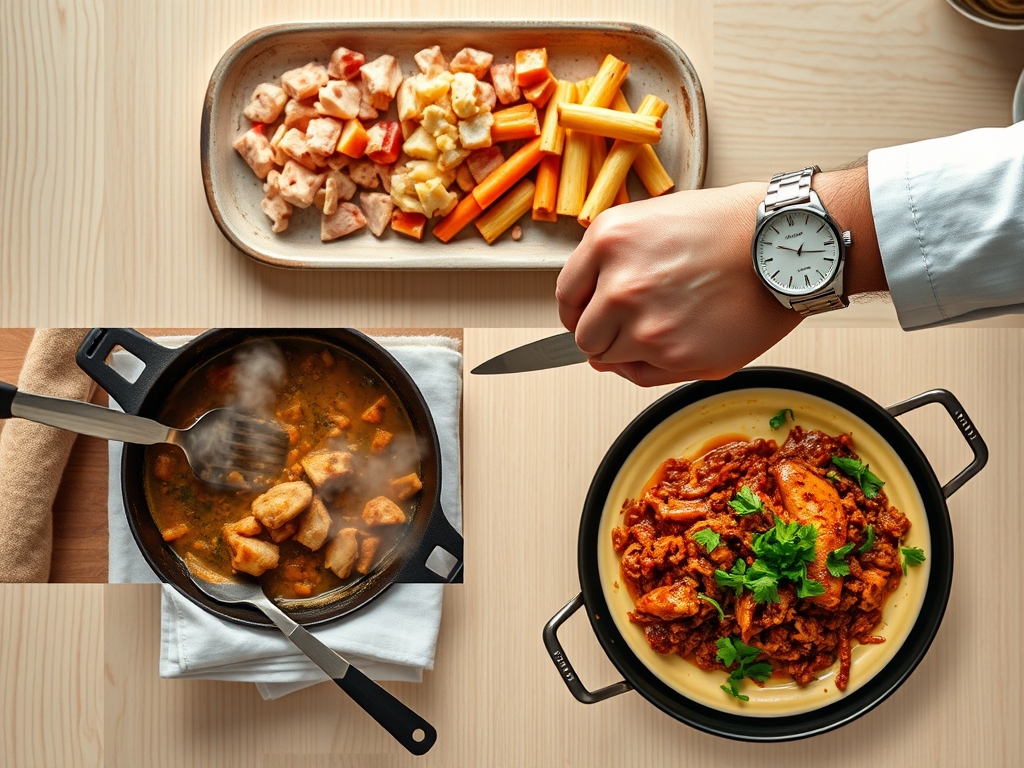
Chef's Flow: While your oven preheats to 375°F (190°C), dice aromatics and shred proteins simultaneously. Start your fond in an oven-safe skillet on the stovetop, then transfer directly to the oven for the final bake. This eliminates dish-switching and capitalizes on residual stovetop heat to jumpstart oven caramelization. Mise-en-place discipline shaves ten minutes off chaotic recipe execution.
The Masterclass
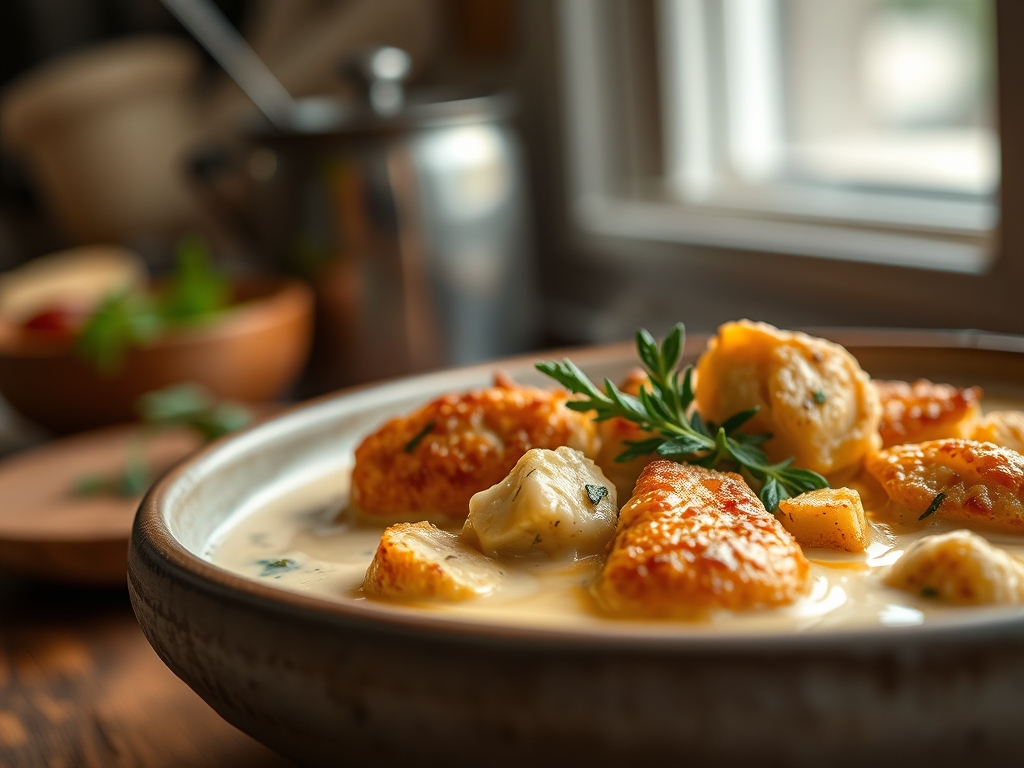
Note the texture shown in the step-by-step photos, particularly the golden fond developing in frame three and the bubbling crust in the final bake shot.
Step 1: Build the Fond
Heat a 10-inch cast-iron skillet over medium-high heat until a water droplet skitters across the surface (around 400°F/204°C). Add butter and let it foam, then swirl in diced onions. Cook undisturbed for 90 seconds to develop browning on the contact side, then stir and repeat twice more.
Chef's Secret: The Maillard reaction peaks between 285°F and 330°F (140°C-165°C). Resist the urge to stir constantly; browning requires sustained contact with the hot pan surface. Those browned bits (fond) contain glutamates and caramelized sugars that multiply perceived savoriness.
Step 2: Bloom the Aromatics
Add minced garlic and fresh thyme leaves, stirring constantly for 30 seconds until fragrant but not browned. Garlic's allicin compounds turn bitter above 350°F (177°C), so watch your heat closely.
Why It Works: Fat-soluble flavor compounds in garlic and thyme transfer into the butter, creating an aromatic base that the soup will later absorb. This step mimics the soffritto technique used in French and Italian cooking, layering flavors incrementally rather than dumping everything at once.
Step 3: Toast the Soup
Spoon the cream of chicken soup directly into the hot skillet without diluting. Spread it across the fond, then let it sit undisturbed for 2 minutes. You'll hear the edges sizzle and see light browning where soup meets pan.
Chef's Secret: Toasting the soup concentrates flavor through moisture evaporation and initiates new Maillard reactions between the soup's proteins and sugars. This single step transforms flat canned flavor into something roasted and complex, adding a nutty undertone absent in the original product.
Step 4: Deglaze and Emulsify
Pour in chicken stock and use a wooden spoon to scrape up all browned bits. Stir vigorously for 45 seconds as the mixture emulsifies into a smooth, glossy sauce. The soup's built-in emulsifiers (lecithin and modified starches) stabilize the fat-water suspension.
Why It Works: Deglazing with stock not only captures fond but also loosens the soup's thick consistency, making it pourable and ensuring even protein distribution. The agitation shears fat droplets into smaller particles, creating a more stable emulsion that won't break under oven heat.
Step 5: Fold in Proteins and Vegetables
Reduce heat to low. Stir in shredded chicken and frozen peas, coating everything evenly. Season with white pepper and a squeeze of fresh lemon juice (about 1 teaspoon). Taste and adjust salt, remembering that the soup already contains sodium.
Chef's Secret: Adding acid at this stage balances the soup's inherent richness and brightens the palate. Lemon juice's citric acid also denatures residual proteins on the chicken surface, improving sauce adhesion. Keep vegetables slightly underdone here; they'll finish in the oven without turning mushy.
Step 6: Crown and Bake
Combine Panko breadcrumbs with grated Parmesan and a drizzle of melted butter. Scatter evenly over the skillet mixture. Transfer to your preheated 375°F (190°C) oven and bake for 12-15 minutes, until the crust is golden and the sauce bubbles at the edges.
Why It Works: The Panko's irregular surface and low moisture content promote rapid browning and superior crunch compared to standard breadcrumbs. Parmesan contributes umami (glutamate) and encourages Maillard browning through its protein and lactose content. The oven's dry heat dehydrates the crust while the sauce beneath steams the proteins, creating textural contrast.
Step 7: Rest and Garnish
Remove from oven and let rest for 3 minutes. This allows the starch network to set, preventing soupy spillage when serving. Garnish with fresh parsley or chives and a final grate of lemon zest.
Chef's Secret: Resting isn't just for meats. Starch-thickened sauces continue to firm as they cool slightly, improving sliceability and mouthfeel. The carryover heat also gently wilts any fresh herbs, releasing their aromatic oils without bitterness.
Nutritional Info
Per serving (based on 4 servings):
Calories: 340
Protein: 28g
Fat: 18g (8g saturated)
Carbohydrates: 19g
Fiber: 2g
Sodium: 780mg
The soup contributes roughly 400mg sodium per serving, so balancing with unsalted stock and minimal added salt keeps totals reasonable. Protein content shines here, making this a solid post-workout meal or high-satiety lunch. Fat percentage sits around 48%, typical for cream-based dishes, but can be reduced by using light soup versions or extending with extra vegetables.
Dietary Swaps
Keto Adaptation: Replace Panko with crushed pork rinds (zero carbs, excellent crunch) and use full-fat cream of chicken soup. Increase fat by adding 2 tablespoons cream cheese to the sauce. Swap peas for sautéed mushrooms or spinach, dropping net carbs to 6g per serving.
Vegan Pivot: Substitute cream of chicken with pureed cannellini beans (1 cup beans blended with 1/2 cup vegetable stock, 2 tablespoons nutritional yeast, and 1 teaspoon onion powder). Use chickpeas or shredded hearts of palm instead of chicken. Replace butter with olive oil and Parmesan with cashew-based vegan cheese. The emulsification principles remain identical.
Gluten-Free: Confirm soup label uses rice or potato starch. Swap Panko for gluten-free breadcrumbs or crushed rice cereal. All other components are naturally gluten-free.
Serving & Presentation
Rustic Family Style: Bring the cast-iron skillet directly to the table on a wooden trivet. Serve with a simple arugula salad dressed in lemon vinaigrette to cut richness.
Elevated Plating: Spoon into shallow bowls, centering a mound of the mixture. Use a ring mold for height. Garnish with microgreens, a drizzle of herb oil, and a shard of baked Parmesan crisp (spread grated Parmesan on parchment, bake at 350°F/177°C for 6 minutes).
Meal Prep Portions: Divide into individual oven-safe ramekins before the final bake. Top each with crust, bake as directed, then cool and refrigerate. Reheat individual portions at 350°F (177°C) for 18 minutes, covering with foil for the first 10 minutes to prevent over-browning.
The Pro-Dodge
Pitfall 1: Broken Sauce
If your sauce separates into oily pools, you've either overheated it or added cold liquid too quickly. Immediate Fix: Remove from heat, add 1 tablespoon cold stock, and whisk vigorously. The temperature drop and agitation will re-emulsify the fat. Return to gentle heat, never exceeding a bare simmer.
Pitfall 2: Soggy Crust
Excess moisture from vegetables or insufficient oven heat causes this. Immediate Fix: If caught early, increase oven to 425°F (218°C) and broil for 2 minutes, watching constantly. For already-baked dishes, remove the crust layer, blot the sauce surface with paper towels, reapply fresh Panko mixture, and broil until crisp.
Pitfall 3: Bland Flavor Despite Following Steps
Under-seasoning or skipping the lemon juice dulls the dish. Immediate Fix: Stir in 1 teaspoon white miso paste or a splash of white wine vinegar to boost umami and acidity. Finish with flaky salt (not table salt) to provide textural salinity bursts rather than uniform blandness.
The Meal Prep Corner
Storage: Cool completely within 2 hours of cooking. Transfer to airtight containers and refrigerate for up to 4 days. The crust will soften in storage; plan to re-crisp during reheating.
Reheating for Day-One Quality: Preheat oven to 350°F (177°C). Transfer portions to an oven-safe dish, cover with foil, and heat for 15 minutes. Remove foil, scatter fresh Panko mixture on top, and broil for 3 minutes until golden. This two-stage reheat prevents drying while restoring crust integrity.
Freezing: Freeze the base mixture (without crust) in portioned containers for up to 3 months. Thaw overnight in the refrigerator, then proceed with the crust and final bake as usual. Freezing pre-baked casseroles yields soggy results; always freeze components separately.
The Wrap
These seven hacks prove that campbell soup cream of chicken recipes deserve respect when executed with proper technique. By understanding the science behind browning, emulsification, and textural contrast, you transform a pantry staple into dishes that rival made-from-scratch versions in flavor complexity while preserving the convenience factor that makes weeknight cooking sustainable. Master the fond, respect the resting times, and never underestimate the power of acid to balance richness. Your family won't believe it started with a can, and that's exactly the point.
Try one hack this week and share your results in the comments. Which technique surprised you most? Let's build a community of smarter, faster cooks who never sacrifice flavor for convenience.
The Kitchen Table
Can I use Cream of Mushroom or Celery soup instead?
Absolutely. Both work identically in these techniques. Cream of mushroom adds earthy umami, while cream of celery offers vegetal sweetness. Toast them exactly as described for cream of chicken to develop comparable depth. Adjust final seasoning, as mushroom versions tend toward higher sodium.
How do I prevent the soup from tasting "canned"?
The toasting step in Step 3 is non-negotiable. Browning the soup directly in the hot skillet initiates new flavor compounds that mask the processed taste. Additionally, always add fresh acid (lemon juice or vinegar) and aromatic herbs at the end. These bright notes counteract the flat, cooked-too-long flavor of canned products.
Can I make this on the stovetop without baking?
Yes. After Step 5, simply simmer covered on low heat for 8 minutes instead of baking. For the crust, toast Panko separately in a dry skillet until golden, then sprinkle over the finished dish. You'll lose some textural contrast but gain speed.
What's the best way to reheat leftovers without drying them out?
Add 2 tablespoons of stock or water to the leftovers before reheating. Cover tightly with foil and reheat at 325°F (163°C) for 20 minutes. The added liquid creates steam, preventing moisture loss. Uncover for the final 5 minutes and add fresh crust if desired.
Can I double this recipe for a crowd?
Easily. Use a 14-inch skillet or divide between two 10-inch pans. When doubling, increase stovetop toasting time by 1 minute to ensure even browning across the larger volume. Baking time remains the same; check for bubbling edges to confirm doneness. The fond-building principles scale perfectly.