
Imagine standing on a dusty roadside in Baltimore while the scent of charcoal and searing protein swirls around you like a delicious fog. That is the essence of Maryland soul. When you master authentic pit beef recipes, you are not just grilling; you are performing a high-heat ritual that transforms a humble bottom round roast into a stack of crimson, ribbon-thin perfection. It is smoky, piquant, and unapologetically bold.
The magic of this sandwich lies in the contrast between the crusty, charred exterior and the cool, rare center. Unlike Texas brisket that demands a low-and-slow commitment, Maryland pit beef is a fast-and-furious affair. We are looking for that perfect Maillard reaction on the surface while maintaining the structural integrity of the muscle fibers inside. It is a delicate balance of thermal physics and old-school patience. If you have ever struggled with chewy or bland results, forget what you know about traditional BBQ. We are diving into the technical secrets that separate the amateurs from the pitmasters.
The Gathers:
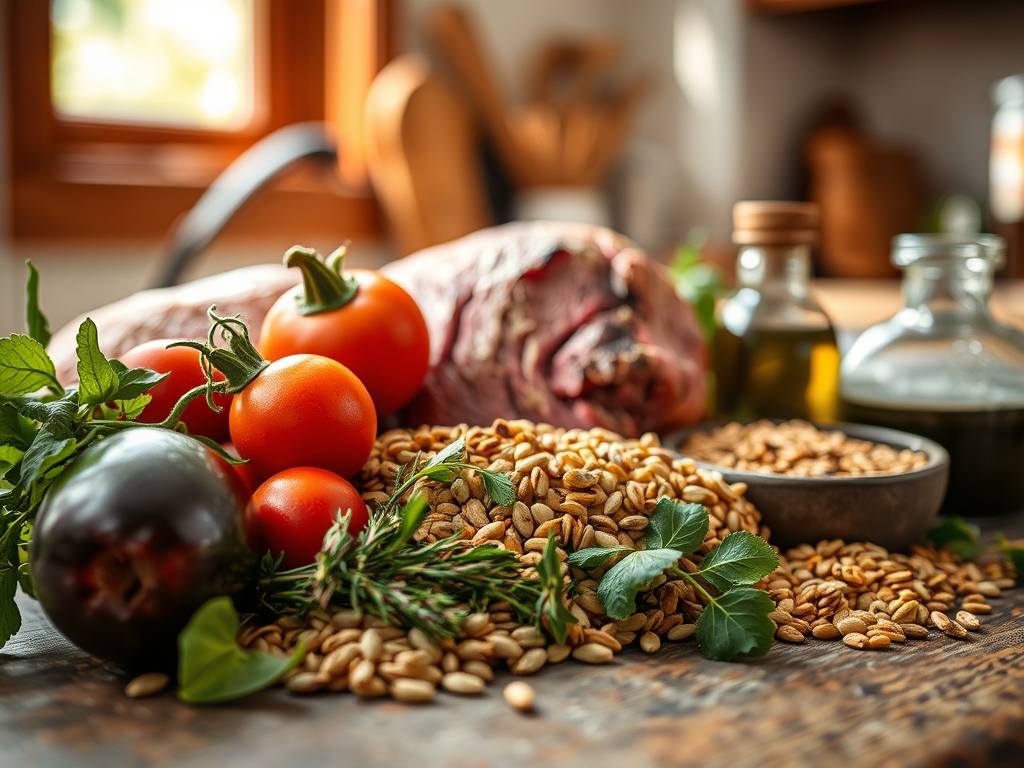
To execute this properly, your mise-en-place must be precise. Start with a five-to-seven pound bottom round roast. This specific cut is chosen for its tight grain and lack of internal connective tissue, which allows for the signature thin slicing. You will need a digital scale to measure your dry rub components precisely; consistency is the hallmark of a pro.
The rub requires a heavy hand of coarse kosher salt, cracked black pepper, granulated garlic, and a touch of smoked paprika to infuse that deep mahogany hue. For the signature "Tiger Sauce," gather high-fat mayonnaise, freshly grated horseradish (use a microplane for maximum surface area and volatile oil release), a splash of lemon juice to denature proteins, and a pinch of sugar to balance the heat.
Smart Substitutions: If you cannot find bottom round, a top round or "London Broil" works beautifully due to its similar lean-to-fat ratio. For a vegan-friendly "pit" experience, thick-cut king oyster mushrooms can be seasoned with the same rub and charred, though the cooking time will drop significantly as they lack the dense myoglobin of beef.
The Clock:
The "Chef's Flow" for pit beef is all about temperature management rather than a strict timer. Expect a total active time of about 45 minutes, with a passive resting phase that is non-negotiable.
- The Chill (2-24 hours): Dry-brining the meat in the fridge allows salt to penetrate the deep muscle tissues via osmosis.
- The Fire (20 minutes): Preheating your charcoal to a screaming 500 degrees Fahrenheit.
- The Sear (30-45 minutes): Direct and indirect heat rotation until the internal temperature hits your target.
- The Rest (30 minutes): This is where the magic happens as the juices redistribute.
- The Slice (10 minutes): Rapid-fire slicing using a commercial-grade deli slicer or a very sharp carving knife.
The Masterclass:
1. The Dry Brine Technique
Generously coat your roast in the salt-heavy rub at least four hours before cooking. Place it on a wire rack over a sheet pan to allow air to circulate around the entire surface.
Pro Tip: This process facilitates enzymatic browning. By drawing moisture out of the surface and then reabsorbing the seasoned brine, you create a dry exterior "pellicle" that chars more efficiently than wet meat.
2. Calibrating the Charcoal
Ignite a full chimney of hardwood lump charcoal. Avoid briquettes if possible; lump charcoal provides a more intense, clean heat that is essential for a proper crust.
Pro Tip: Hardwood lump charcoal burns hotter and faster. This creates a high thermal gradient, allowing the outside to sear before the heat can overcook the delicate center.
3. The Sear and Rotate
Place the beef directly over the hottest part of the coals. Use heavy-duty tongs to flip the roast every 5 minutes, ensuring every square inch meets the flame.
Pro Tip: Frequent flipping prevents the "gray band" of overcooked meat. This technique, known as constant-flip searing, keeps the internal temperature rising slowly while the exterior undergoes intense caramelization.
4. Indirect Finishing
Once a dark crust has formed, move the roast to the cooler side of the grill. Close the lid to create an oven-like environment.
Pro Tip: Use a digital probe thermometer to pull the meat at exactly 125 degrees Fahrenheit. Thermal carryover will raise the internal temperature to a perfect 130-135 degrees (medium-rare) while it rests.
5. The Power Rest
Transfer the beef to a wooden cutting board and tent it loosely with foil. Do not cut it yet.
Pro Tip: Resting allows the viscous juices, which have migrated toward the center during cooking, to re-saturate the outer fibers. Cutting too early results in "purging," where all that flavor ends up on the board instead of in the sandwich.
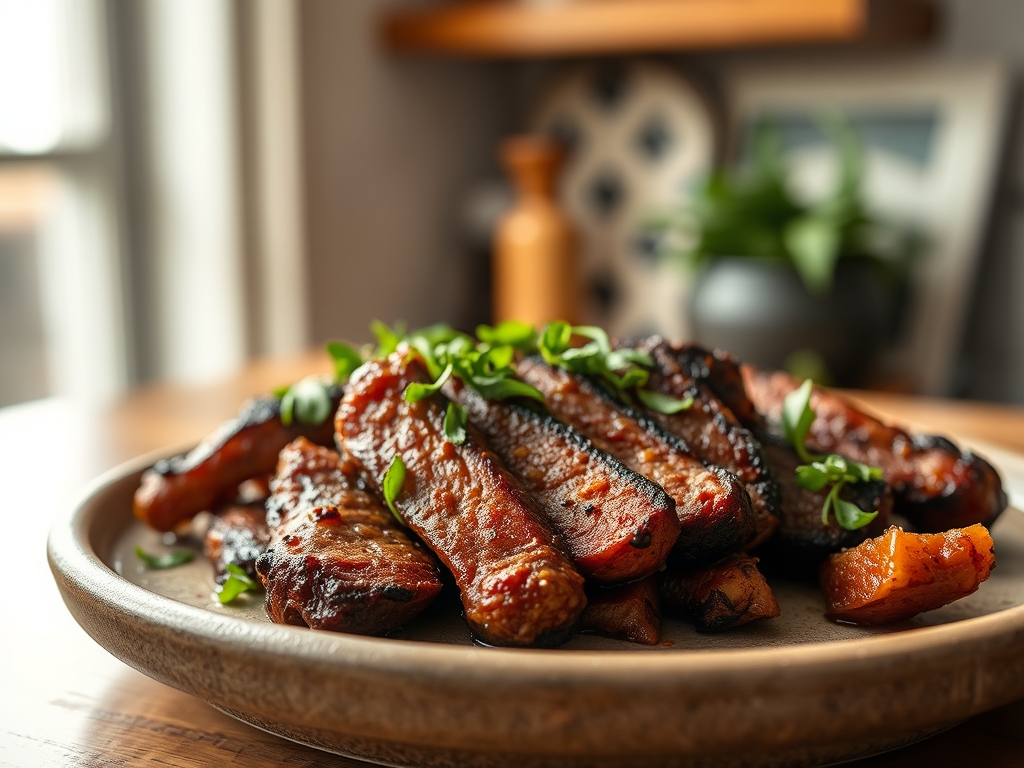
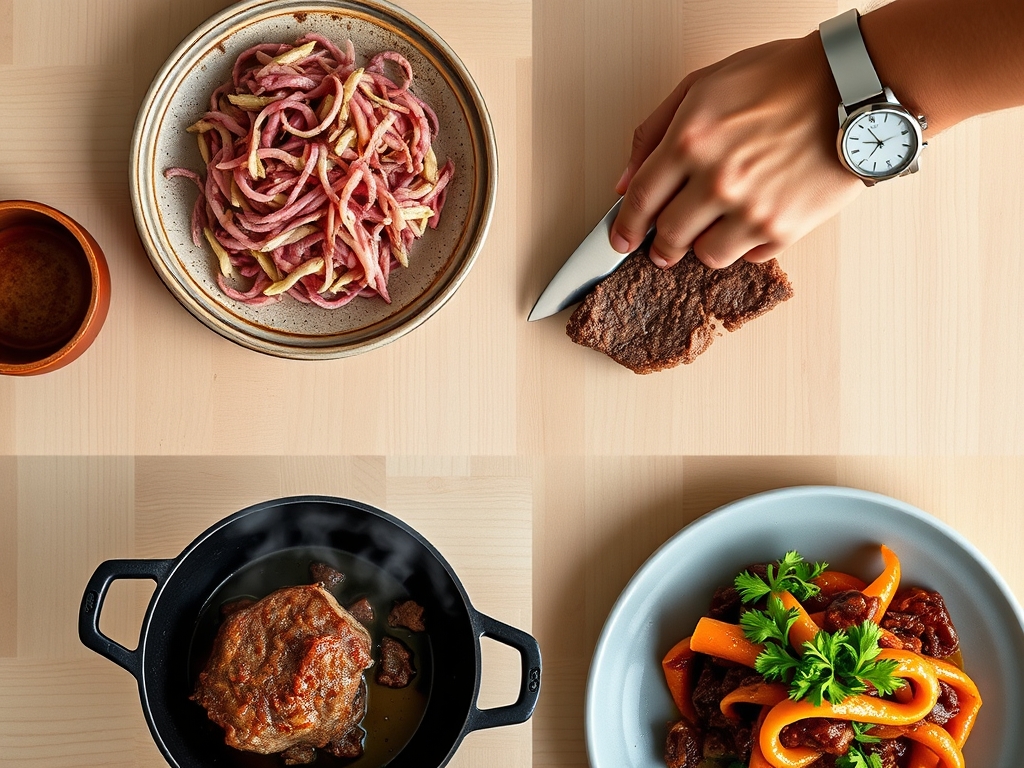
6. The Shave
The hallmark of Maryland pit beef recipes is the "shaved" texture. Use a bench scraper to clear your workspace and slice against the grain as thinly as humanly possible.
Pro Tip: Slicing against the grain mechanically breaks down the long muscle fibers, making even a lean cut of beef feel incredibly tender on the palate.
The Deep Dive:
Macro Nutrition: A standard 6-ounce serving of pit beef is a protein powerhouse, offering roughly 45g of protein and 12g of fat. It is naturally low in carbohydrates, provided you skip the traditional kaiser roll.
Dietary Swaps:
- Keto: Serve the beef over a bed of bitter greens with extra Tiger Sauce.
- Gluten-Free: Ensure your rub doesn't contain anti-caking agents with gluten; swap the roll for a GF bun or lettuce wrap.
- Vegan: Use the aforementioned king oyster mushrooms or "seitan" steaks, though you will need to add liquid smoke to mimic the charcoal infusion.
The Fix-It:
- Problem: The meat is tough. Fix: You likely sliced with the grain. Rotate the roast 90 degrees and try again.
- Problem: The exterior is burnt but the inside is raw. Fix: Your fire was too hot. Move to indirect heat sooner and use a lower rack setting.
- Problem: The Tiger Sauce is too watery. Fix: Use a saucier to whisk in more mayo or a pinch of xanthan gum to stabilize the emulsion.
Meal Prep & Reheating: To maintain "day-one" quality, do not microwave the beef. Instead, flash-sear the cold slices in a heavy-bottomed skillet for 30 seconds or steam them briefly over a pot of simmering water to gently melt the fats without toughening the proteins.
The Wrap-Up:
Mastering pit beef is about more than just fire; it is about the intersection of high-heat chemistry and precision slicing. When you nail that balance of a charred "bark" and a tender, ruby-red interior, you are serving a piece of culinary history. Grab your tongs, calibrate your thermometer, and get ready to be the hero of the backyard. This is bold, messy, and absolutely brilliant.
The Kitchen Table:
What is the best cut for pit beef recipes?
The bottom round is the gold standard. It is lean, affordable, and possesses a uniform shape that makes thin slicing easy. Top round is a suitable secondary option if bottom round is unavailable at your local butcher.
Why is my pit beef tough?
Toughness usually results from slicing too thick or slicing with the grain. For maximum tenderness, use a very sharp knife to create paper-thin ribbons and always cut perpendicular to the visible muscle fibers.
How do I get a good crust without overcooking?
Use the "constant flip" method over high heat. By turning the meat every few minutes, you build a thick Maillard crust while the internal temperature rises slowly, preventing the center from becoming well-done and dry.
What is in the traditional sauce?
The classic Baltimore "Tiger Sauce" is a pungent mix of mayonnaise and heavy horseradish. It provides a creamy, spicy contrast to the smoky beef. Some variations include lemon juice, garlic, or a dash of black pepper for depth.