
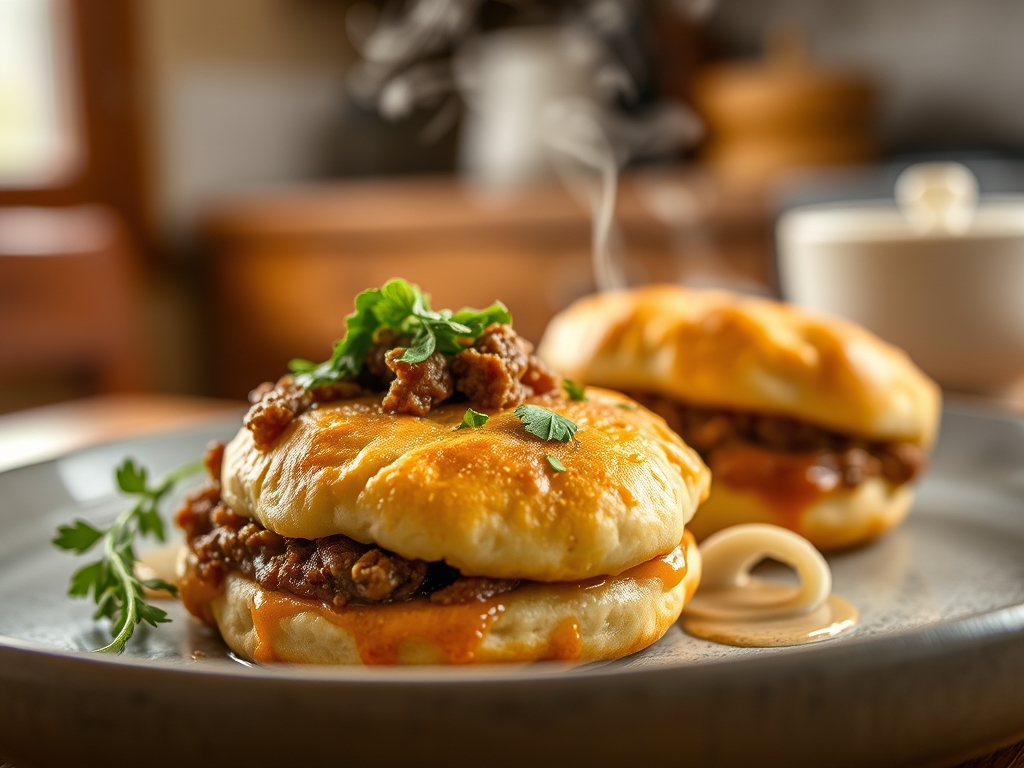
Picture the scent of a heavy bottomed skillet hitting its smoke point as cold, marbleized protein meets the heat. That sizzle is the sound of the Maillard reaction, a chemical transformation where amino acids and sugars rearrange to create complex, savory flavor profiles. When you are craving comfort but lack the hours for a five course production, pillsbury biscuits ground beef recipes offer the perfect intersection of culinary science and weeknight efficiency. It is the ultimate alchemy of a buttery, laminated dough meeting the rich, rendered fats of high quality beef.
We are moving beyond the standard casserole here. Think of these nine variations as a masterclass in texture and heat distribution. By utilizing the consistent leavening agents in pre-made dough, we can focus our energy on the aromatics and the emulsification of sauces. Whether you are aiming for a piquant taco bake or a deep, umami-heavy mushroom and beef cobbler, the goal is a golden, aerated crust that shatters upon impact, revealing a succulent, well seasoned center. Let us roll up our sleeves and dive into the mechanics of the perfect bake.
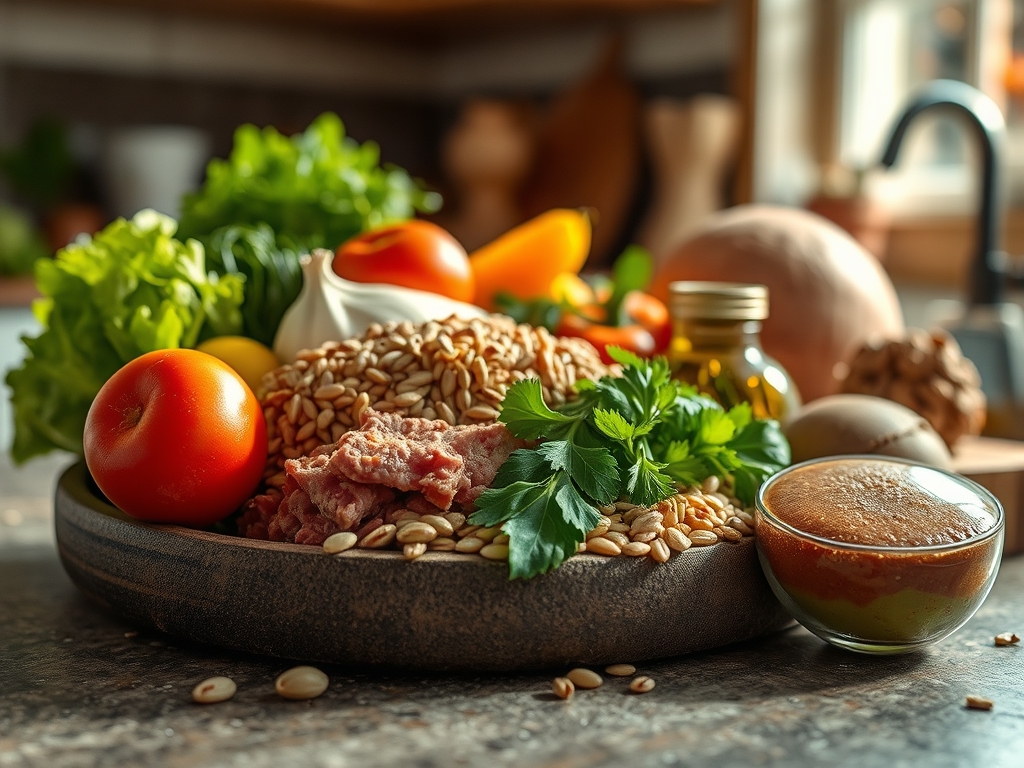
The Gathers:
Setting up your mise-en-place is not just about organization; it is about controlling the variables of your kitchen environment. For these recipes, you will need 80/20 ground chuck to ensure enough fat to render and carry the flavor of your spices. You will also need two cans of refrigerated biscuits, which rely on sodium acid pyrophosphate for that signature lift.
Gather your aromatics: yellow onions for their high sugar content (perfect for caramelizing), cloves of garlic, and perhaps some poblano peppers for a subtle, smoky heat. You will want a high quality sharp cheddar or a viscous Gruyere to act as a binding agent. On the tool front, keep a microplane handy for zesting or grating hard cheeses, and a bench scraper to help portion your dough with surgical precision.
Smart Substitutions:
If you are looking to lighten the profile, swap the beef for ground turkey but add a tablespoon of Worcestershire sauce to mimic the missing umami. For a dairy alternative, use a high fat coconut milk in your sauces to maintain that luscious mouthfeel without the lactose. If you find yourself out of fresh garlic, a dash of garlic oil provides a more concentrated, infused flavor than the granulated stuff ever could.
The Clock
Efficiency in the kitchen is all about the Chef's Flow. This is the art of overlapping tasks so that no second is wasted while the oven preheats to 375 degrees Fahrenheit. Total active prep time for these bakes usually clocks in at 15 minutes, with a 20 to 25 minute bake time.
The flow works like this: start your protein in the skillet first. While the fat renders, you use those few minutes to chop your vegetables and quarter your biscuits. By the time the meat is browned, your oven is at temperature, and you are ready to assemble. This synchronized approach ensures that your dough does not sit out too long and lose its chill, which is vital for maintaining those flaky, laminated layers.
The Masterclass
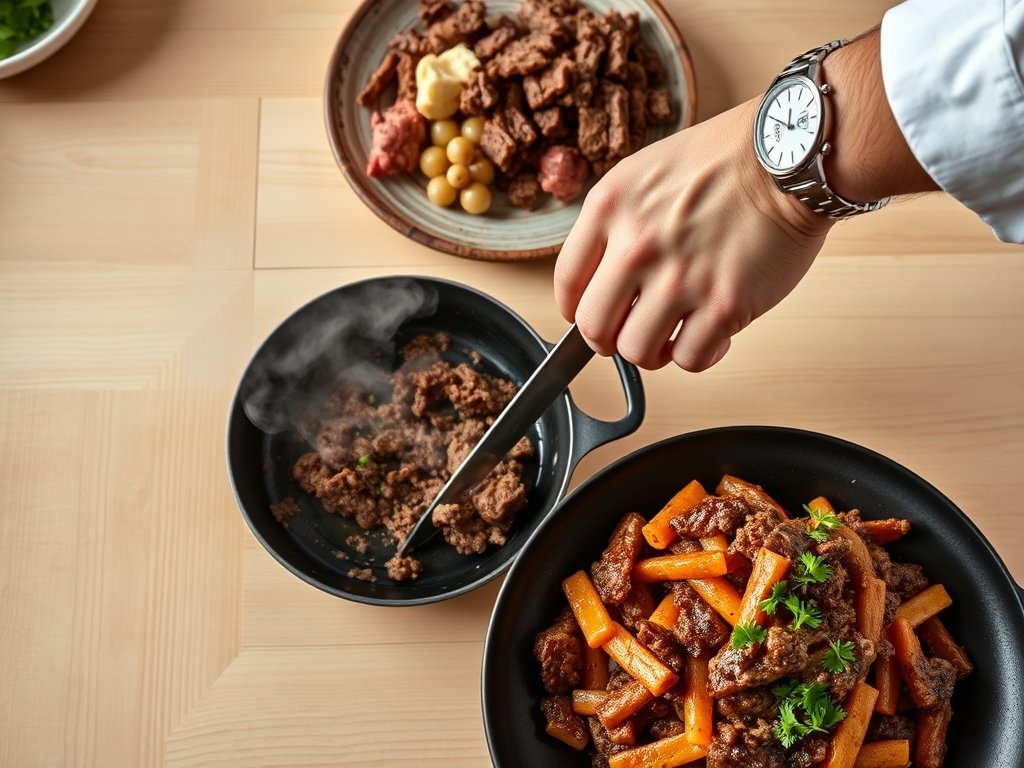
1. The Sear and Render
Place your ground beef into a preheated heavy-bottomed skillet. Do not crowd the pan; you want to sear the meat, not steam it in its own juices. Use a stiff spatula to break the protein into uniform crumbles, ensuring even heat distribution.
Pro Tip: This stage is all about enzymatic browning. By letting the meat sit undisturbed for two minutes before stirring, you maximize the surface area undergoing the Maillard reaction, which creates a deeper, more savory base for your bake.
2. Deglaze and Infuse
Once the meat is browned, remove excess fat but leave a thin coating. Toss in your onions and garlic. As they soften, use a splash of beef stock or dry wine to deglaze the pan, scraping up those flavorful brown bits (the fond) stuck to the bottom.
Pro Tip: Adding a liquid to a hot pan creates steam that releases the fond. This process incorporates concentrated flavor back into the sauce, preventing a one-dimensional taste profile.
3. The Emulsion Bridge
Incorporate your thickening agent, whether it is a sprinkle of flour or a dollop of cream cheese. Stir constantly to create a viscous sauce that coats the back of a spoon. This ensures the beef stays moist during the secondary cooking phase in the oven.
Pro Tip: This step creates a stable emulsion. If your sauce looks "broken" or oily, add a tablespoon of warm water and whisk vigorously to re-bind the fats and liquids.
4. The Lamination Layout
Quarter your biscuits using a bench scraper or kitchen shears. Toss them in a bowl with a little melted butter and herbs. Gently fold them into the beef mixture or layer them on top, ensuring there is enough space for air to circulate between the pieces.
Pro Tip: Airflow is essential for thermal convection. If you pack the biscuits too tightly, the centers will remain gummy while the tops burn. Spacing allows the leavening agents to expand fully.
5. The Golden Finish
Slide your dish into the center rack of the oven. Bake until the internal temperature of the filling reaches 165 degrees Fahrenheit and the biscuits are a deep, matte gold.
Pro Tip: Remember thermal carryover. The internal temperature will continue to rise by 5 degrees after you remove it from the heat. Pulling the dish at the peak of golden-brown prevents the dough from drying out.
The Deep Dive
From a nutritional standpoint, these bakes are protein-dense, providing roughly 22 grams of protein per serving. To manage the caloric load, consider serving with a bright, acidic arugula salad to cut through the richness of the fats.
Dietary Swaps: For a gluten free version, you can find specialized biscuit doughs in the frozen aisle, though they may require a slightly longer bake time. For a keto-friendly tweak, replace the biscuits with roasted cauliflower florets tossed in a parmesan crust.
The Fix-It:
- Soggy Bottoms: This happens if your beef mixture is too watery. Solution: Always reduce your sauce until it is thick and glossy before adding the dough.
- Burnt Tops, Raw Centers: Your oven might be running hot. Solution: Tent the dish with foil halfway through the bake to protect the surface while the middle catches up.
- Bland Flavor: You likely under-salted the meat. Solution: Season in layers. Salt the beef, then the aromatics, then the sauce.
Meal Prep Science: To maintain day-one quality, reheat leftovers in an air fryer or oven at 350 degrees. Microwaves vibrate water molecules, which turns the starches in the biscuits rubbery. Dry heat re-crisps the fats, restoring the original texture.
The Wrap-Up
Mastering pillsbury biscuits ground beef recipes is about more than just convenience; it is about understanding how heat and fat interact to create something greater than the sum of its parts. You now have the technical foundation to experiment with bold flavors, from spicy chorizo blends to sophisticated truffle infusions. Go forth, use your tools with confidence, and enjoy the crunch of that perfect, buttery crust. Your kitchen is your laboratory, and dinner is the successful experiment.
The Kitchen Table
Can I prep the beef filling a day in advance?
Yes. Cooking the beef and aromatics ahead of time allows flavors to infuse more deeply. Store the cooled filling in an airtight container. When ready, simply top with fresh biscuits and bake as directed.
Why are my biscuits not rising properly?
Check the expiration date on the can. The chemical leaveners lose potency over time. Also, ensure you are placing the dough on the mixture just before it goes into the oven to avoid premature melting.
What is the best way to drain excess grease?
Use tongs to hold a wadded paper towel and mop up the rendered fat in the skillet. This method is safer than pouring hot grease into a container and keeps the flavorful fond intact.
Can I freeze the assembled bake before cooking?
It is not recommended. The moisture from the beef will hydrate the raw dough, leading to a structural collapse. For best results, freeze the cooked filling separately and add fresh biscuits when you are ready to bake.