
Picture the scene: a quiet Tuesday evening transformed by the scent of sizzling lemon zest and the rhythmic crackle of parchment paper. We are chasing that elusive restaurant quality crust without the grease splatters or the stress. Finding simple salmon recipes oven baked is the ultimate culinary cheat code for the modern kitchen. It is about working smarter, not harder, to achieve that buttery, flake-apart texture every single time.
Salmon is a fascinating protein because it is essentially a bundle of delicate muscle fibers held together by a rich, fatty connective tissue called collagen. When we bake it, we are not just heating meat; we are managing a complex thermal transformation. If we go too fast, the proteins contract and squeeze out that unappealing white substance called albumin. If we go too slow, we lose the vibrant color. Today, I am showing you how to balance those scales. We are going to treat your kitchen like a laboratory and your dinner like a masterpiece. By the end of this guide, you will understand exactly how heat interacts with omega-3 fatty acids to create a meal that feels like a warm hug but tastes like a five-star reservation.
The Gathers:
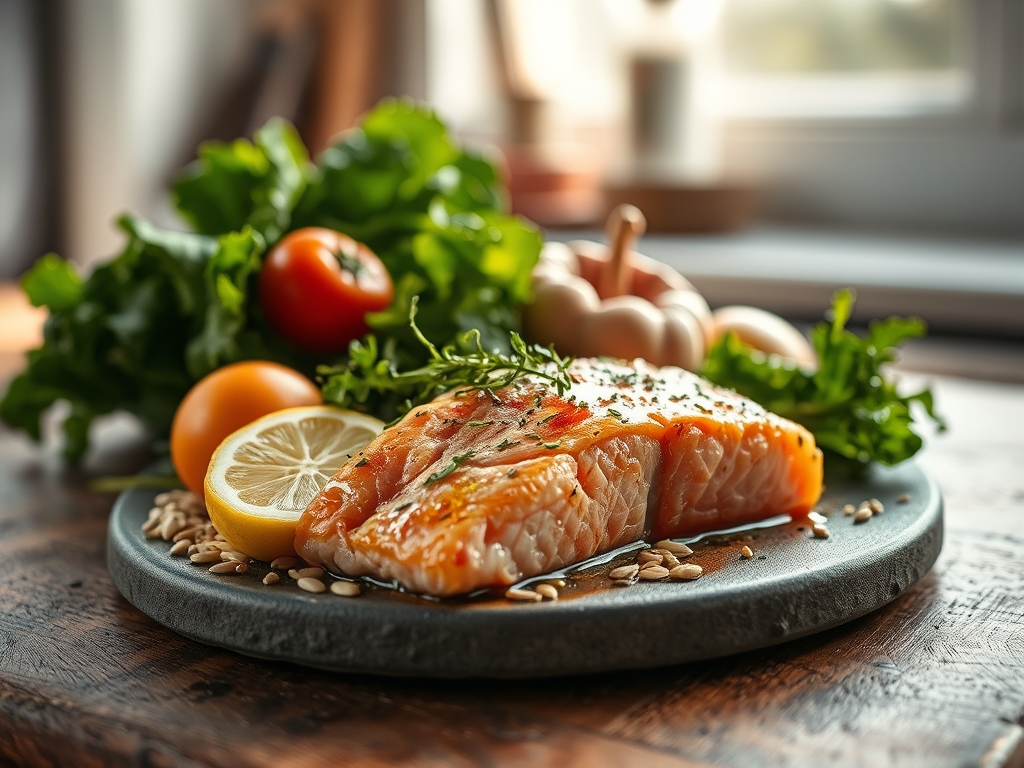
Before we touch the oven dial, we need our mise-en-place. For our primary protein, look for center-cut fillets; they have a more uniform thickness than the tail, which ensures even heat distribution. You will need high-quality extra virgin olive oil for its viscous mouthfeel and high polyphenol count. Grab a handful of woody herbs like rosemary or thyme to infuse the fat.
Your toolkit is just as vital as your ingredients. You will need a digital scale to ensure your portions are consistent, a microplane for that ultra-fine citrus zest that dissolves into the crust, and a heavy-bottomed sheet pan to prevent warping under high heat. If you are making a side sauce, a small saucier is better than a standard pot because its rounded edges allow a whisk to reach every millimeter of the mixture, preventing scorching.
Smart Substitutions: If you are out of lemons, a splash of verjuice or a piquant white balsamic vinegar provides the necessary acidity to cut through the fish's richness. For those avoiding butter, an avocado oil-based mayonnaise creates an incredible moisture barrier that mimics the emulsification of a classic hollandaise without the dairy.
The Clock
Efficiency in the kitchen is all about the "Chef's Flow." This is the sequence of actions that minimizes downtime. Total active prep time should be exactly 10 minutes, with a bake time ranging from 12 to 15 minutes depending on the thickness of your fillets.
Start by preheating your oven. This is non-negotiable. If the oven is still climbing in temperature when the fish goes in, you will end up with a mushy texture. While the air inside the oven aerates and stabilizes, you do your chopping and seasoning. By the time your timer dings, the fish should be resting on the counter, allowing the internal juices to redistribute. This 25-minute window is the "golden hour" of weeknight cooking.
The Masterclass
1. The Tempering Phase
Take your salmon out of the refrigerator 20 minutes before cooking. Bringing the protein closer to room temperature prevents "thermal shock," where the outside overcooks before the center even begins to warm.
Pro Tip: Cold fish causes the steam inside the oven to condense, which ruins your chances of a crisp exterior. Tempering ensures a more uniform Maillard reaction.
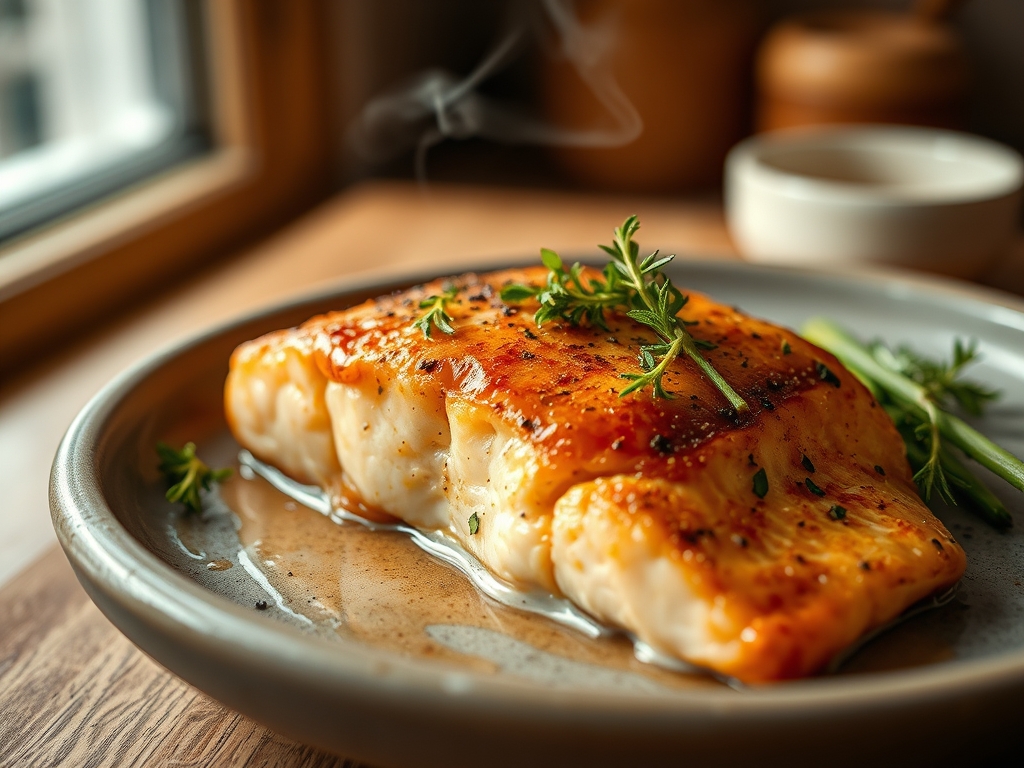
2. The Desiccated Surface
Use a paper towel to pat the skin and flesh completely dry. Any surface moisture will turn to steam in the oven, effectively boiling your fish rather than roasting it.
Pro Tip: Dry skin is the secret to "crackling" salmon. Removing moisture allows the heat to immediately begin rendering the subcutaneous fat.
3. The Fat Barrier
Brush the fillets generously with your oil or melted ghee. You want a thin, even coat that acts as a heat conductor. Use a pastry brush to ensure you cover the sides, not just the top.
Pro Tip: Fat is a superior heat conductor compared to air. This coating creates a "frying" effect even in a convection environment.
4. The Seasoning Lift
Season from about twelve inches above the fish. This height allows the salt crystals to disperse evenly rather than clumping in one spot. Use a coarse sea salt for better tactile control.
Pro Tip: Salt breaks down the myosin proteins on the surface, which helps the fish retain its natural juices during the bake.
5. The Aromatics Bed
Place your lemon slices and herb sprigs directly on the pan, then set the salmon on top. This creates a flavor-infused steam that rises into the meat while protecting the delicate bottom from direct metal contact.
Pro Tip: This "buffer zone" prevents the bottom of the fillet from becoming tough and leathery before the top is done.
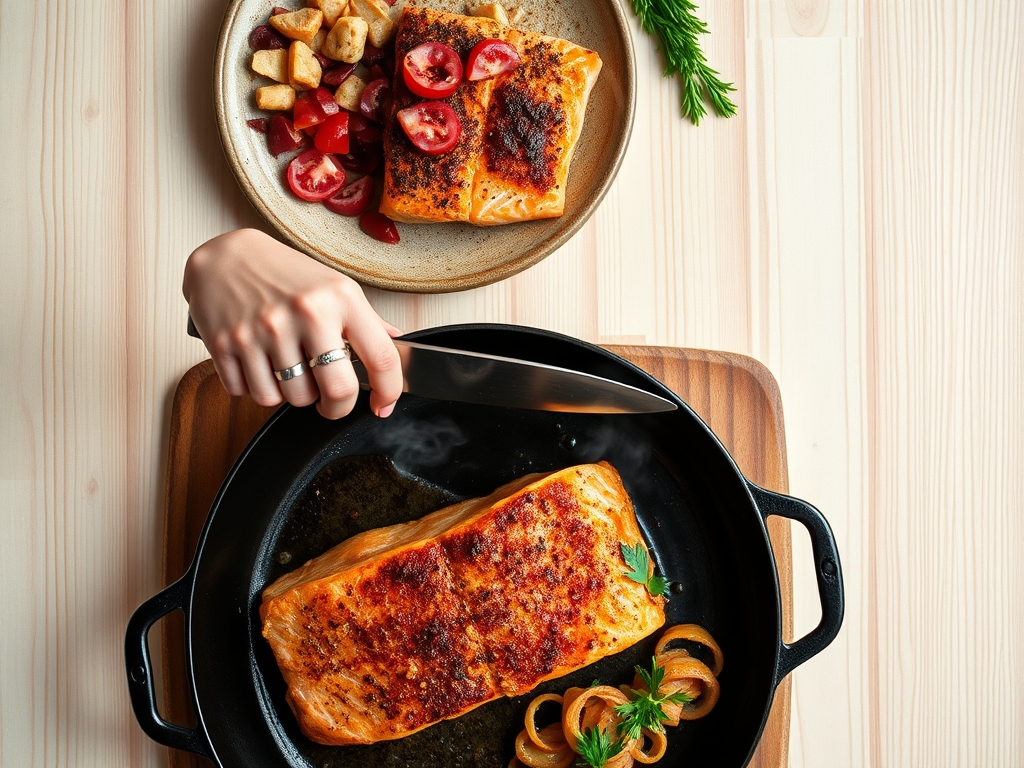
6. The Precise Placement
Slide your sheet pan into the center rack of the oven. If your oven has a "hot spot," rotate the pan 180 degrees halfway through the cooking process using tongs for safety.
Pro Tip: Central placement ensures even convection currents, preventing one side of the fillet from drying out.
7. The Carryover Calculation
Pull the salmon out when it reaches an internal temperature of 125 degrees Fahrenheit. It will continue to cook on the hot pan for several minutes after it leaves the oven.
Pro Tip: This is called thermal carryover. If you wait until it looks "done" in the oven, it will be overcooked by the time it reaches the table.
The Deep Dive
From a nutritional standpoint, salmon is a powerhouse. A standard six-ounce fillet provides roughly 34 grams of high-quality protein and is one of the best sources of Vitamin B12 and Selenium. For those following a Keto lifestyle, the high fat-to-protein ratio makes this a staple. Vegan friends can apply these same roasting techniques to "watermelon steaks" or thick-cut cauliflower, though the cooking times will vary.
The Fix-It: Common Pitfalls
- The White Gunk: If you see too much albumin (the white protein), your oven is too hot. Lower the temp by 25 degrees next time.
- Stuck Skin: If the skin sticks to the pan, you didn't use enough fat or your pan wasn't preheated. Use a bench scraper to gently lift the fish without breaking it.
- Fishy Odor: This usually means the fish wasn't fresh or the fat has oxidized. Always buy "sushi-grade" or "flash-frozen" for the cleanest flavor profile.
Meal Prep Science: To reheat salmon without it turning into rubber, avoid the microwave. Instead, place it in a 275-degree oven with a tablespoon of water and cover it with foil. This creates a gentle steam bath that re-hydrates the protein fibers.
The Wrap-Up
Mastering simple salmon recipes oven baked is about respecting the chemistry of the kitchen. By focusing on moisture control, temperature management, and the right tools, you transform a basic ingredient into a sophisticated meal. Remember to trust your senses; the way the fish flakes under a fork is your best indicator of success. Now, grab your apron and let's get cooking!
The Kitchen Table
How do I know when the salmon is done?
The most reliable method is using a digital thermometer to hit 125-130 degrees Fahrenheit. Visually, the flesh should change from translucent to opaque and flake easily when pressed gently with a fork or a dull knife.
Should I bake salmon covered or uncovered?
Bake it uncovered for a roasted, firm texture and better color. If you prefer a poached, softer consistency, you can wrap it in parchment paper or foil, which traps steam and prevents the exterior from browning.
Is it better to bake salmon at 350 or 400?
Baking at 400 degrees Fahrenheit is generally superior for simple salmon recipes oven baked. The higher heat creates a better crust and shorter cook time, which helps keep the interior moist and prevents the proteins from tightening too much.
Do you have to flip salmon in the oven?
No flipping is required. Because the heat in an oven surrounds the fish, flipping is unnecessary and often results in the delicate fillet breaking apart. Just leave it skin-side down to protect the flesh from the hot pan.